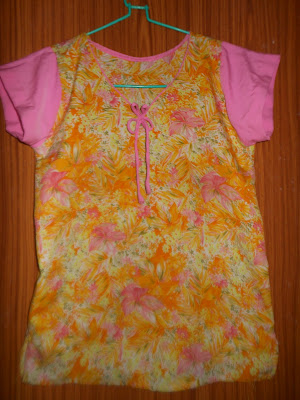
Showing posts with label tops. Show all posts

Wednesday, October 14, 2015

Kurti / Straight - Cut Kameez Sewing tutorial


 I have already posted the method of drafting kurti/Straight - Cut  Kameez here is the link drafting tutorial


  Cutting


Fold the fabric according to the hip measurement that is  1/4th of hip + 1.5".and mark the measurements directly on the cloth according to the draft.  

Length                 =               O - L
Neck width          =               O - A
Shoulder              =               O - D
Shoulder drop      =               D - F
Armhole              =               D - E
Chest                   =               From fold to C.
Waist length        =               O-H
Waist                   =                P-Q
hip length            =                O-J
Hip                      =                J-K 

When finished  ,cut along the shape (along the marked scissors in fig 2)
Remember one thing that you have to cut the front and back neckline separately. Also note that you have to cut the front and back armhole separately.  

Fig 2
After cutting, the kameez will look like the one in fig 3.


Fig 3 after cutting 


FIg 4
Cut the sleeves according to the draft. Cut the inner curve shape at the front armhole
(fig 5&6).


Fig 5

Sleeves Fig 6
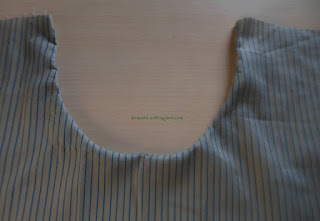
 First finish the back neckline and front neckline separately.

Fig 7 Back neckline
 Then join the shoulders.

Fig 8 

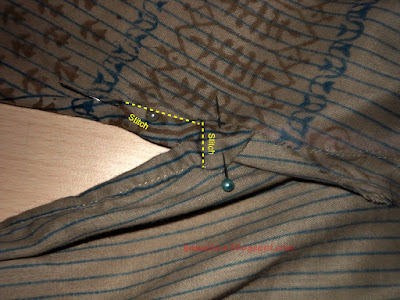
Sew the back neckline with hand hem or machine stitch. In fig 9 the dotted line indicates hem or machine stitch.

Fig 9

Place center point of the sleeves at the shoulder line (joint) by  keeping right sides together and also matching the armhole front curve to sleeves' front curve. (in Fig 10, O indicates the shoulder joint and N is center of the sleeves) leave 1/2"  from the edge, for seam allowances .
  
Fig 10
Keep pins binding the sleeves to armscye (armhole) and sew along the seam line.  I have shown  the seam line by marking the dots in   the fig 11 .
Fig 11 Sleeves attaching


after attaching the sleeves. 

fig 

fig 13

Join the side edges of the sleeves and right sides of the body together and mark the seam line  by keeping  1" seam allowance from the edge. Start sewing from sleeves and up to slit/side opening.
 (keeping slit length  from hip circumference that is J K  to bottom of the kameez, Repeat the same for the other side of the garment too.
 You can easily understand through the figs 14&15
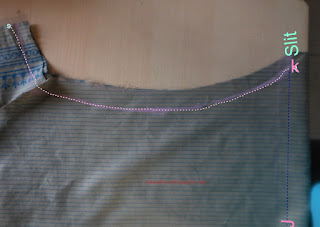

Fig 14


fig 15 sewed the sides
Fig 16 indicates the slit or opening

Slit opening fig16
Stitch the bottom edge of the kameez by  double folding inside. Stitch the Back and front bottom edges separately.

Slit opening


Stitch the slit from the side edge of the back part to that of the front part, 1/2" above through the joining of the kameez by folding in double towards inside. When you are stitching from back to front, before going to front, stop  1/2" above  where the slit open turn the kameez towards you, stitch across the foldings.

Again turn towards you and start stitching at the end by folding the sides. the images 17,18 and 19 give clear information

Pin over double fold on the back side edge towards the wrong side of the kameez. Start stitching from  bottom to  till 1/2" above of the joining of the sides of kameez,. There, you turn the fabric towards you and stitch across the folding and another side and  turn again and continue stitch until you reach the edge.
Repeat the whole thing for the other side of the garment.
Images 17


image 18

Image 19


Tuesday, October 13, 2015

How to stitch a neckline with facing

 Facing means  a piece of material sewn inside of the garment,especially at the neck and armholes to strengthen it. In this tutorial, I'm gonna tell you how to stitch a neckline with facing.

Firstly, stay stitch around the neckline immediately after cutting the neckline. Now, place the neckline on the folded fabric as in Image 1.


Image 1
  Mark along the neckline carefully as in Image 2.

Image 2

Mark  extra 1 1/2" from the neckline towards outside of the neckline (that is "RR")  PP is original neck line and P R is the width of the neckline facing (image 3).

Image 3
cut the neckline facing (both along RR and PP) Image 4

Image 4

After cutting the neckline facing, stitch the outer side of the edge by folding 1/2"inward and sew along the shape to prevent the threads coming out from here and there along the edges.
Image 5 neckline facing

Lay the right side of the neck line flat, Place the facing on top (,right side to right side). Match the facing around the neckline edges and pin the facing in place (.Image 6)
  

Image 6
Stitch  a seam  at  1/2" in from the edge along the neckline edge . Take care that the seam line follows the curve.   When  stitching  the neckline curve,  stitch slowly and  smoothly, raise the pressure foot and turn  the fabric through slightly  and lower the pressure foot and continue stitching.  Be careful and don't straighten the fabric otherwise it will lose its shape. Clip the seam allowance around the neck  edge with intervals. but don't cut the seams as Image  7
,

Image 7

 pressing the seam allowance towards facing, understitch and  turn the facing towards inside of the neckline. image 8


Image 8
After turning the facing,  topstitch the edge along the neckline image 9 .


that's it!! u re done!!!!  
TIP: You can make necklines of various shapes with this technique, not just a circular one.
        You can also use this technique and add a border to your neckline line as done in this tutorial

Please share ur experiences in the comments below.. :) Thanks everybody!!

Saturday, February 14, 2015

Crochet Applique Top


When I saw  my mother crocheting  this  design for something else, I asked her if Icould use it for a top. Then, i started off with the top. 

I chose this top to be simple, so I thought the crochet pattern would fit it well.


Before cutting the neckline, I attached the pattern to the centre of the part, by hand, with running     stitch.When it appeared perfect to me , I finished it off by giving final touch on the  sewing machine.     
  

    After attaching the pattern, I cut the neckline.


 To give it more elegance, I sewed the binding on the neckline  by a same colored fabric as the  patttern.
 I used the same fabric for the border of the sleeves and the  bottom.


lastly I joined the back and front parts together and attached the sleeves to bodice piece. and there it is..


Friday, July 26, 2013

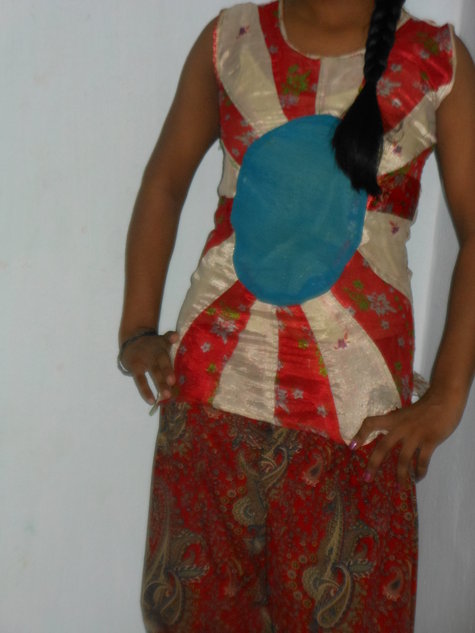
Sleeveless Wheel Top


The top looks elegant and beautiful but there is a lot of work beyond making this. This is a product of my daughter’s thought and hardwork. She sewed it in about 5 hrs. First she made the layout on a paper. She then cut out 2 pieces of each colored (red and white). Next, she joined all the 16 pieces with a central oval part in blue.

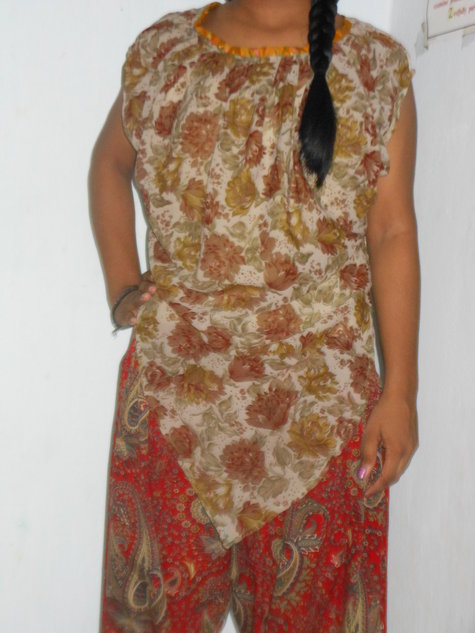
Mushroom - Balloon Top


My daughter sewed this top just for fun and it turned out to be really good! The frilled neckline is the highlight of the dress. The front bodice piece was cut to have the triangular edge which adds to the beauty.

Monday, January 7, 2013

Kurti

I designed this pink kurta and sewed it around 4 years ago.


Wednesday, October 3, 2012

Kurtis

These kurtis  were sewn out of crape material.


Slit Collar neckline red kurti